Monday, 2 July 2012

Experiments with superhydrophobia

I've been looking at superhydrophobic coatings to see if they might be a way to prevent the "wet glass" style of sticking seen in from-the-bottom DLP based 3D printers. This is a very simple way to make such a surface:


All I did was sand a block of Teflon/PFTE with some 240 grit wet and dry sand paper. This creates the required peaks on the surface that allow the already hydrophobic PTFE to become superhydrophobic. I tried this some weeks ago very briefly but it did not seem to work. Turns out that the surface is quite delicate, touching with the fingers "bruises" the surface and it looses the effect, or perhaps it is the oils from the skin.

Another cool trick was to drop the block into water, the upper surface gains a sheen due to air being trapped in the valleys of the surface structure. The water can't enter so the air is trapped.

Tuesday, 26 June 2012

More circle generation

So another way is to configure like this:


And yet another way is to use a wedge prism and spin that, deviation on the commercial ones I have seen is about 10 degrees but you can add a second to get 20.


No more tears laser scanning?

Assuming cheap 405nm laser diodes can be used to cure resin for a 3D printer design we are left with the issue of the scanning system. To ensure that the laser is focussed at the the plane across the entire plane and that the beam moves at the same speed an f-theta lens is used. This makes the relationship between the scan angle and position at the focal plane proportional to f.theta. The problem is that the focal length of the lens depends on wavelength so a different lens is required for 405nm than for the red laser used in a laser printer.

Here is a possible solution. High end photoplotters expose their film on the inside of a drum using a rotating mirror with a single face (monogon). They don't need correcting optics because the distance between mirror and  internal drum surface is always constant across the scan. 


Can this idea be used for a flat plane, I think so:


By putting the rotating mirror at a more oblique angle the beam forms a cone, that cone focusses at the same plane, perpendicular to the axis of the rotating mirror. As is shown on the right the optics are simple, a collimator followed by a focussing lens then the rotating mirror. There is an obvious disadvantage with the proposed system, that the beam follows a curved path, that however is just a software issue, distorting the bitmaps to suit. Another disadvantage is the scan speed, a polygon scanner with 6 sides can scan 6 times per rotation, this one will only do one scan (two sort of but lets not go there). That said it was likely that the the polygon would need to do multiple scans to get the required exposure so that may not be an issue anyway.


A further issue is diffraction if you try to make a FTB (from the bottom) system the scanned beam will be shifted by the transparent window. This would also be a problem for any other scanning system and indeed imaging systems (DLP) however the problem can probably be corrected in software for this case as the refraction will just tend to reduce the scan diameter slightly and consistantly.


Here is another idea about how to implement it, using a brushless motor with a hollow shaft makes it easy to get clearance from the motor and makes for a neat assembly. You could even spin the optics but I am not so sure that is a good idea, spinning the laser would be even better but ~10Mhz pulses via slip rings seems a bad idea :)


Wednesday, 20 June 2012

48hrs later

Wow I've been itching to get at the PDMS for the past two days and tonight I finally got to play with it.

Firstly what was I thinking with my two pieces or perspex hinge thing, yes I needed to bend the silicone to pull on the rods but up is as good as down. I could have used a single piece. That is what comes with doing things on the fly and being seduced by "clever" ideas.

As expected the rods did come out and to be honest as expected it did take a bit of a toll on the silicone, I think a primer should probably be used to keep it well stuck to the perspex and apparently they are available. There were also a few bits of silicone pulled into the channels by the rods so if something like this method were to be used the other ends should be encapsulated in silicone.


Now it is free of plastercine (never again will I use that for this process) I have stuck it in the oven at about 70C to ensure it is as cured as it can be. Then I need to sort out the manifolds and see how it responds to negative pressure, then I'll mix up some solution that is index matched. Glycerol and water can be used it seems but may be too viscous, other stuff can be added to boost the index too. I've got a recipe for something with the index of PDMS and the viscosity of blood and I guess that would do OK.

Tuesday, 19 June 2012

Another release method

Here is another release method. Although the practicalities might not be quite there I think the basic idea of indexing something that causes the release might be a good one. It means you can use things that are not optically matched (or even opaque) to deform the PDMS layer.


So this time cast into the PDMS close to the upper surface is a "grill" of metal rods but this time they are there so stay. 1) The light it projected from below as normal except the image contains gaps that match the grill. At this stage we have partially printed this layer. 2) We now slide the vat by half the grill's pitch. The parts that were not cured last time can now be imaged. 3) pressing the grill downwards deforms the PDMS and releases the part. This could be done from one side to allow a gradual inflow of resin. Then the part is raised by one layer height and the grill released and the process repeated.

The same idea can actually be used on the previous concept using channels except there is no need to worry about any optical matching.

SBRM (sticky bottom release mechanism) attempt 1

This is a quick and dirty, non optimal attempt to make the sticky bottom release mechanism previously mentioned. It may well end in disaster for a variety of reasons.


Two pieces of perspex are laid together.


A hinge is formed with packing tape. This will prevent the pdms flowing between the sheets and provide a release agent for the right hand sheet (nothing sticks to pp tape). For reasons to be explained


Wire is laid on the sheet and two pieces of Plastercine are pushed in place to form the manifolds.


A border is added to contain the PDMS. Once the PDMS is cured the plastercine can be removed along with the right hand perspex plate. Then the overhanging PDMS can be folded to allow pliars to grab the metal wires and extract them, I HOPE. Afterwards the manifolds will be capped with more perspex of similar to seal them.


The PDMS is mixed and poured (Sylgard 184)


The bubbles seem to leave quite freely and the surface looks pretty good. I can't bake this because of the Plastercine so it will be 24hrs before cured I think  nope, 48hrs. I covered it with an upturned tray to keep out the dust.

To be continued .....

Monday, 18 June 2012

Solving the problem of a sticky bottom

As the previous post explains, even if your part is not glued to the bottom of the vat it may still be stuck. I'm trying to find a way around this that allows for large area printing from the bottom (FTB).

To un-stick the part from the vat bottom we need to allow fluid to get between the part and the vat. The gap between the two is so small that there is no chance for it to just seep underneath and we cannot simply drill holes in the vat and pump it in as that resin would get cured as well.

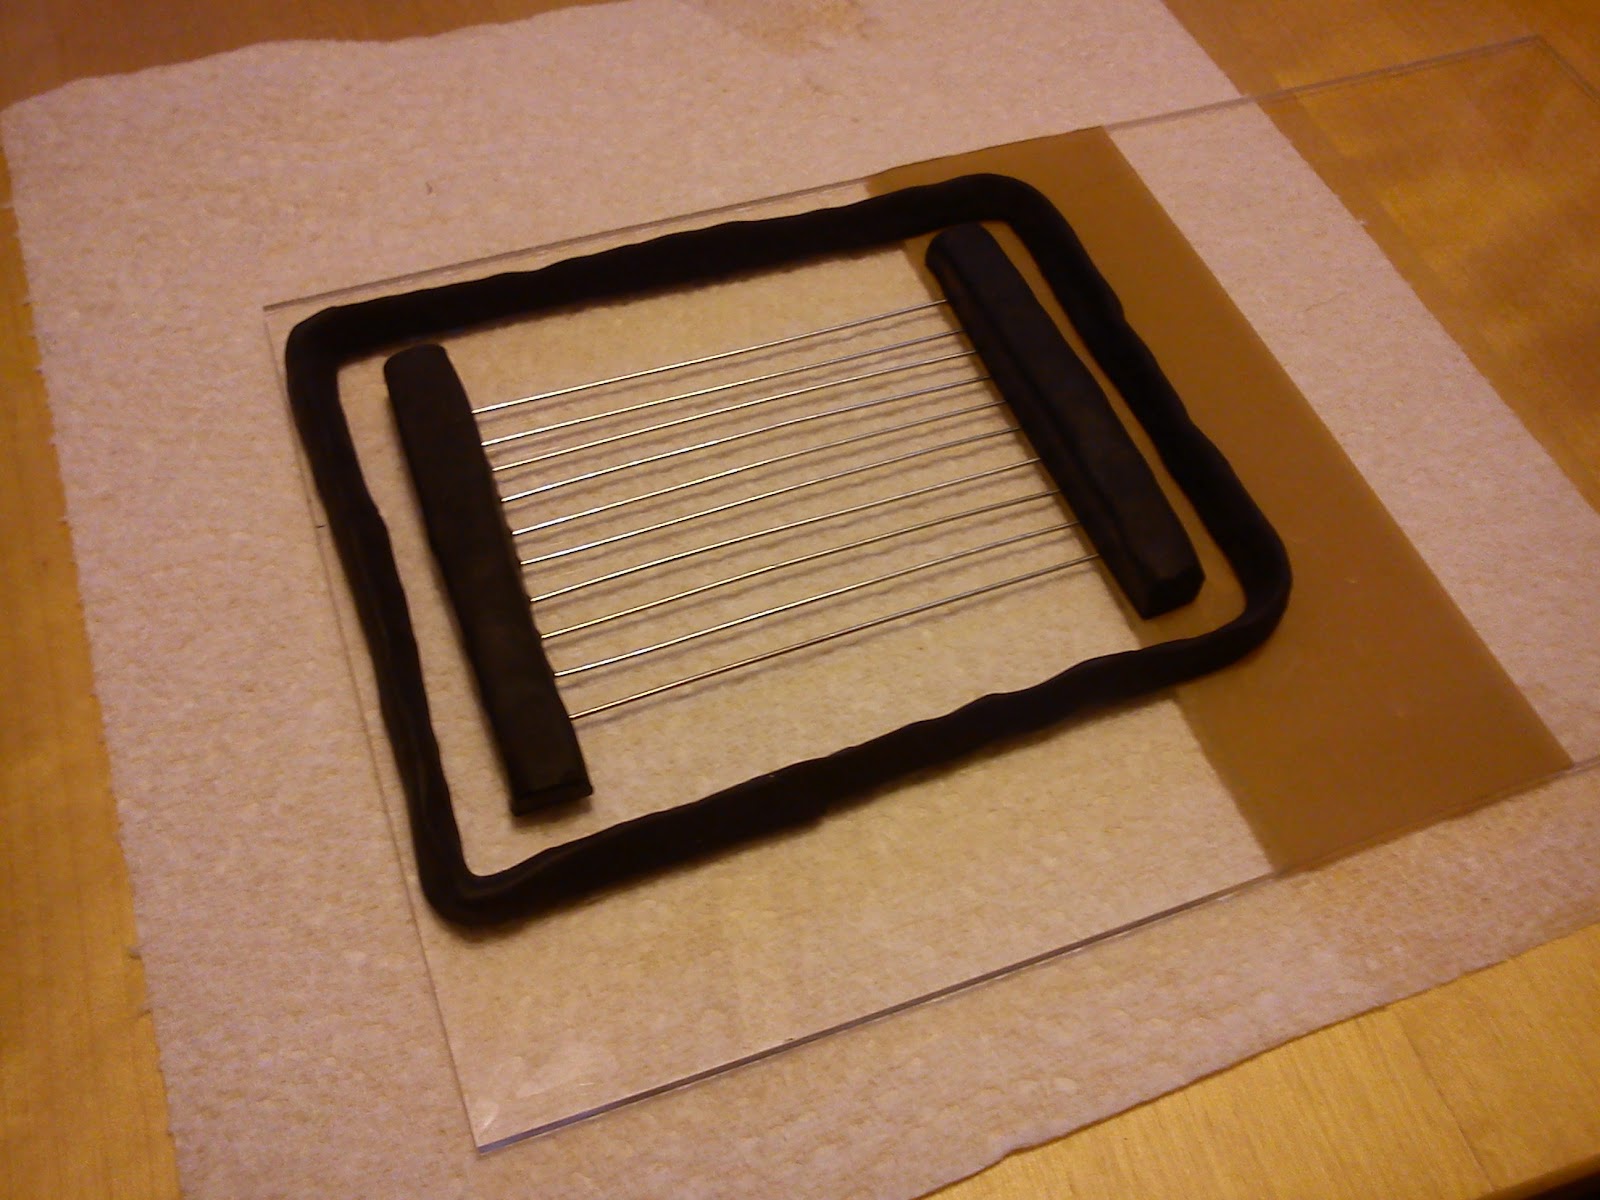
My idea is to have a number of tunnels in the flexible PDMS (silicone) vat bottom containing a fluid that has the same refractive index as the PDMS, this means optically it is as if the fluid was not there. If a negative pressure if applied to this fluid then it will distort the PDMS and that could allow fluid to flow underneath.


Hopefully the above diagram makes sense. The vat bottom is glass and the projector shines up through it. On top of that is the clear PDMS layer and then a thin layer of the light cure resin. On the left we see a part with a large surface area being printed, a small layer of resin at the top surface of the PDMS has just been cured and although the part is not glued to the silicone it can still not be lifted off without significant force. Between the glass and the PDMS are the channels filled with the index matched fluid. On the right the fluid has been evacuated and the upper surface of the PDMS has become corrugated, with the correct design of channels it should be possible to get complete separation of the part and the PDMS. It make require a small amount of time while the fluid flows beneath, it will depend on the viscosity.


Here is one way the channels might be laid out. I've suggested a diaphragm based unit to provide suction actuated by a solenoid. A spring is added to make it more gradual.


And this is another way to configure the channels, this time with a syringe type suction device.


And a few ways the channels might be created depending on the manufacturing method.